A tool to help you stream your radio station to Amazon’s Alexa devices.
Used by Internet, AM, FM and DAB stations around the world!
Reading Timee: 12 minutes
In this post I’ll explain how to run your own Internet radio station. On top of that, I’ll show you how to build an Alexa skill to deploy your station in the cloud, so anyone with Alexa can say: “Alexa, play <whatever_station>” and hear your Internet radio station. There are many tutorials that describe this, but most of them require that you pay for some radio station hosting. If that’s easier for you, then you can skip this tutorial. If you want to have your own radio on the Internet (build from scratch) and deploy it or not on Alexa, than this guide is for you. There are some prerequisites though. You’ll need a CentOS 7 instance with a public IP and if you decide to publish it on Alexa, then you’ll need valid SSL certificate.
IMPORTANT: If your want your station to be public on Alexa, then you also need license for the music. But no worries, if you just want your music played over Alexa at home (and not public), you can still do it.
Also, the ices2 client can’t stream MP3 files, so you have to convert them to OGG. If you want to stream MP3s directly, check the earlier version of ices. The configuration file is almost identical. Ogg-Vorbis is perfectly fine and I’ll show you how to convert your library from MP3 to OGG.
So, there are two parts of this tutorial. Build your own station first and then the optional Alexa part. Let’s start.
CentOS 7
Make sure you have a CentOS 7 instance ready in the cloud with a public IP. NATed instances are OK as long as you can control the ports. In addition, make sure SELinux is disabled. Disabling the OS firewall is optional. I assume that the firewall on the instance is on.
icecast
icecast is a streaming server similar to shoutcast. It broadcasts a stream that’s provided by a source. The source can be a microphone, sound card or a file. In order to stream a file, we need a client such as ices, LiquidSoap etc. You are not the client, you are the listener. Now that we have this straighten up, let’s install icecast from the source. Just copy and paste everything below. If you get an error, execute line by line and see where it fails. Fix any issues, if any.
yum -y groupinstall "Development Tools"
yum install -y wget curl-devel libvorbis-devel libxslt-devel libxslt-devel openssl-devel
cd /tmp
wget http://downloads.xiph.org/releases/icecast/icecast-2.4.4.tar.gz
tar xzvf icecast-2.4.4.tar.gz
cd icecast-2.4.4
./configure --prefix=/opt/icecast --with-curl --with-openssl
make
make install
We specified /opt/icecast where icecast will be installed (line 7). You can change that in the configure statement, but you have to adjust everything after. icecast creates a sample configuration file named icecast.xml under /opt/icecast/etc. If you look at the XML file, you’ll see a bunch of settings and some of them have to be changed.
We’ll change the following parameters:
- <location> Specifies where the radio station is located.
- <admin> An e-mail address of the radio station admin.
- <hostname> A hostname for the radio station. Important only if you are publishing this in YP directory of broadcast streams. Irrelevant for us, but we’ll change it anyway.
- <source-password> A password so the source client can attach to the icecast server and provide the OGG stream.
- <relay-password> Used only if the icecast is used as a relay.
- <admin-user> Username for the admin web page.
- <admin-password> Password for the admin user.
- <logdir> A directory where the log file is stored.
- <user> A local OS user that will run icecast. Don’t use root, it won’t work. You can create a separate user for this. The built-in nobody user is perfectly fine.
- <group> A local OS group that will run icecast.
So, let’s change these manually or with this code. Adjust to suit your needs.
cd /opt/icecast/etc
location="New Jersey"
[email protected]
hostname=radio.iandreev.com
sourcepwd=Sup3rStr0ngP455w0rd
relaypwd=Sup3rStr0ngP455w0rd
admin=myusername
password=Sup3rStr0ngP455w0rd
logdir=/opt/icecast/log
user=nobody
group=nobody
sed -i "s/<location>Earth/<location>$location/" icecast.xml
sed -i "s/<admin>icemaster@localhost/<admin>$admin/" icecast.xml
sed -i "s/<hostname>localhost/<hostname>$hostname/" icecast.xml
sed -i "s/<source-password>hackme/<source-password>$sourcepwd/" icecast.xml
sed -i "s/<relay-password>hackme/<relay-password>$relaypwd/" icecast.xml
sed -i "s/<admin-user>admin/<admin-user>$admin/" icecast.xml
sed -i "s/<admin-password>hackme/<admin-password>$password/" icecast.xml
sed -i "s|<logdir>/opt/icecast/var/log/icecast|<logdir>$logdir|" icecast.xml
sed -i "s/<user>nobody/<user>$user/" icecast.xml
sed -i "s/<group>nogroup/<group>$group/" icecast.xml
Let’s create the log directory and give the icecast daemon permission to write.
cd /opt/icecast
mkdir log
chown -R nobody:nobody log
icecast doesn’t come with a startup systemd script, so we’ll have to take care of that.
cat << EOF > /etc/systemd/system/icecast.service
[Unit]
Description=Icecast Network Audio Streaming Server
After=network.target

[Service]
Type=simple
User=nobody
Group=nobody
ExecStart=/opt/icecast/bin/icecast -c /opt/icecast/etc/icecast.xml
ExecReload=/bin/kill -HUP $MAINPID
ExecStop=/bin/kill $MAINPID

[Install]
WantedBy=multi-user.target
EOF
Now you can enable icecast on boot and start it.
systemctl enable icecast
systemctl start icecast
If you run systemctl status icecast, you should see that the daemon is running. Also, if you check the error log (tail /opt/icecast/log/error.log), you’ll see that the daemon is running too. Ignore the SSL warning for now.
icecast runs on port 8000, so if you have a firewall, you’ll have to poke a hole.
firewall-cmd --add-port=8000/tcp --zone=public --permanent
firewall-cmd --reload
From a browser, go to your server’s IP on port 8000, e.g. http://201.202.203.24:8000 and you’ll see something like this.
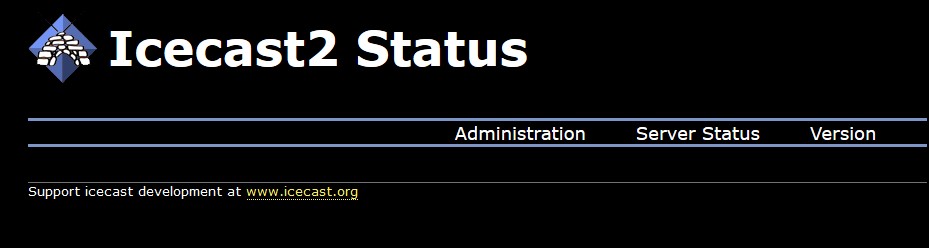
If you click on Administration, you’ll be prompted to log in. Use the admin-user and admin-password that you’ve changed in icecast.xml.
ices
Now that we have the streaming server ready, let’s install the source client. The source client will provide the stream to the server. We’ll use ices for this.
cd /tmp
wget http://downloads.us.xiph.org/releases/ices/ices-2.0.2.tar.gz
tar xzvf ices-2.0.2.tar.gz
cd ices-2.0.2
yum -y install libshout-devel
./configure --prefix=/opt/ices
make && make install
ices creates some configuration files under /opt/ices/share/ices. We’ll use the ices-playlist.xml template to generate a radio station for us.
cd /opt/ices/share/ices
cp ices-playlist.xml myradio.xml
Now edit myradio.xml and change the following with a script or manually. Make sure you adjust for your needs.
- <logpath> A directory where the log file is stored.
- <logfile> The name of the log file.
- <name> The name of your radio.
- <genre> Self explanatory.
- <description> Enter a description for your station.
- <password> The password to connect to icecast. It should match the source-password in icecast.xml
- <mount> The name of the mount. This is like the URL for your station. It has to end with .ogg
- <param name> A file where the playlist for this station will be stored.
cd /opt/ices/share/ices
logpath=/opt/ices/log
logfile=myradio.log
name="Radio MyRadio"
genre="Some genre"
descr="Best Radio in the Universe and beyond"
pwd=Sup3rStr0ngP455w0rd
mount=/myradio.ogg
playlist=/opt/ices/playlists/myradio.txt
sed -i "s|<logpath>/var/log/ices|<logpath>$logpath|" myradio.xml
sed -i "s/<logfile>ices.log/<logfile>$logfile/" myradio.xml
sed -i "s/<name>Example stream name/<name>$name/" myradio.xml
sed -i "s/<genre>Example genre/<genre>$genre/" myradio.xml
sed -i "s/<description>A short description of your stream/<description>$descr/" myradio.xml
sed -i "s/<password>hackme/<password>$pwd/" myradio.xml
sed -i "s|<mount>/example1.ogg|<mount>$mount|" myradio.xml
sed -i "s|<param name=\"file\">playlist.txt|<param name=\"file\">$playlist|" myradio.xml
Let’s create two directories. One for the logs and the other for the files where we’ll store playlists. Not the music files the playlists. The playlists tells ices where to look for your music.
cd /opt/ices
mkdir log playlists
chown -R nobody:nobody log
Create a startup script for ices as well. Look at line 10, that’s where my config file for this radio station is. Can you have multiple radio stations? Absolutely, one icecast server can handle multiple ices clients. Just invoke another ices client with a different config file and create a similar startup script with a different URL, e.g …/myradio.ogg and …/mystation.ogg.
cat << EOF > /etc/systemd/system/ices-myradio.service
[Unit]
Description=Ices Network Audio Streaming Client for MyRadio
After=icecast.service

[Service]
Type=simple
User=nobody
Group=nobody
ExecStart=/opt/ices/bin/ices /opt/ices/share/ices/myradio.xml
ExecReload=/bin/kill -HUP $MAINPID
ExecStop=/bin/kill $MAINPID
Restart=always
RestartSec=3

[Install]
WantedBy=multi-user.target
EOF
At this point you can tell ices where your music is stored. As I mentioned earlier, we’ll have to use Ogg-Vorbis files (.ogg).
So, create a folder where your music files will be stored. I’ll use /music/myradio and put some public royalty free music there.
Courtesy of Patrick de Arteaga. Please give him some credit and visit his site.
mkdir -p /music/myradio
cd /music/myradio
wget -U 'Mozilla/5.0 (X11; U; Linux i686; en-US; rv:1.8.1.6) Gecko/20070802 SeaMonkey/1.1.4' https://patrickdearteaga.com/audio/Battleship.ogg
wget -U 'Mozilla/5.0 (X11; U; Linux i686; en-US; rv:1.8.1.6) Gecko/20070802 SeaMonkey/1.1.4' https://patrickdearteaga.com/audio/Chiptronical.ogg
wget -U 'Mozilla/5.0 (X11; U; Linux i686; en-US; rv:1.8.1.6) Gecko/20070802 SeaMonkey/1.1.4' https://patrickdearteaga.com/audio/Friends.ogg
OK, so we have our music there. When the stream ends, it will start from the first song. Now we have to create the playlist and put it under the /opt/ices/conf directory.
If you remember we specified directive in the myradio.xml file referencing where the playlist is stored. Let’s create the file.
ls -d /music/myradio/*.ogg > /opt/ices/playlists/myradio.txtNow that we have everything ready, let’s enable ices on boot and start it.
systemctl enable ices-myradio
systemctl start ices-myradio
Check if everything is OK.
systemctl status ices-myradio
tail /opt/ices/log/myradio.log
If everything looks good, you can listen to your stream at http://whateverIP:8000/myradio.ogg.
If you are satisfied with this, you can stop reading. You’ve accomplished enough. If you want to see how to convert MP3 to OGG and how to use a reverse proxy so you can stream over HTTP, then read further.
MP3 to OGG conversion (sox)
If you have a bunch of files that you want to convert to OGG, you can use sox. It’s a very powerful tool for conversion between formats. Let’s install it first.
yum -y install libmad-devel libid3tag-devel lame lame-devel flac flac-devel
cd /tmp
wget https://sourceforge.net/projects/sox/files/sox/14.4.2/sox-14.4.2.tar.gz
tar xvfz sox-14.4.2.tar.gz
cd sox-14.4.2
./configure
make -s && make install
Now you can convert the files from MP3 to OGG and vice versa. Conversion is very simple. Just specify the source and the destination file, e.g. sox file1.mp3 file1.ogg and that’s it. If you want to see the details of the file such as bit-rate, duration, sample etc, use soxi, e.g. soxi file.ogg. If you want more details on sox and it’s usage, please check their website. For soxi, check this link.
If you want to convert your files in bulk, you can use this command that will search for MP3 files in your current directory and subdirectories and convert them to OGG.
find . -type f -name "*.mp3" -exec sh -c 'sox "$1" "${1%.mp3}.ogg"' _ {} \;
nginx as reverse proxy
If you recall, we are using http://somenameorip:8000/myradio.ogg to access our station. This is fine for regular users from their home, but in any corporate environment, anything than port 80 and 443 are blocked. So, we have to stream our music over port 80. I’ll show later how to stream over 443 because it’s a requirement for Alexa. First thing first, let’s install nginx.
yum -y install nginx
systemctl enable nginx
nginx creates a configuration file under /etc/nginx called nginx.conf. Look for this snippet in the configuration file.
location / {
}
…and change it to this.
location /myradio.ogg {
  proxy_set_header Host $host;
  proxy_set_header X-Real-IP $remote_addr;
  proxy_pass http://localhost:8000/myradio.ogg;
}
You can start the reverse proxy now and verify that it’s working.
systemctl start nginx
systemctl status nginx
Because we are proxying over HTTP, we have to open the firewall too and if you want you can close port 8000. It’s not needed anymore.
firewall-cmd --add-port=80/tcp --zone=public --permanent
firewall-cmd --remove-port=8000/tcp --zone=public --permanent
firewall-cmd --reload
Now you can access your station as http://serveriporname/myradio.ogg, so there is no need to specify port 8000.
SSL certificate
If you decide to publish your station on Alexa, you’ll need a valid (not self-signed) certificate. You will also need to reconfigure both nginx and icecast to use SSL. You can’t access your server by IP because you’ll get an invalid certificate warning, so make sure you have your DNS ready to resolve your IP to a valid domain name. Get the certificates ready. You’ll need the private key, the certificate, the intermediate certificate and the root CA certificate. When you purchase a certificate all of these will be available for you (except for the private key).
Let’s create the chain. In my case, I have each certificate in a separate file and I’ll create one certificate for icecast.
mkdir /opt/icecast/ssl
cat star.iandreev.com.key star.iandreev.com.crt star.iandreev.com.inter star.iandreev.com.CA > /opt/icecast/ssl/icecast.pem
chown -R nobody:nobody /opt/icecast/ssl
Then, edit /opt/icecast/etc/icecast.xml and find the following snippet.
<listen-socket>
    <port>8000</port>
</listen-socket>
Copy these three lines after, so the config looks like this now. We are telling icecast to spawn itself and listen on port 8443 too.
<listen-socket>
    <port>8000</port>
</listen-socket>
<listen-socket>
    <port>8443</port>
    <ssl>1</ssl>
</listen-socket>
We also have to specify the certificate chain. Find this line in the config and uncomment it. Make sure you uncomment the line, it’s commented by default.
<ssl-certificate>/opt/icecast/ssl/icecast.pem</ssl-certificate>
Now, you have to restart icecast and ices too.
systemctl restart icecast
systemctl restart ices-myradio
And if you check the error.log (yes, error log), you’ll see that icecast is using SSL now.
tail /opt/icecast/log/error.log
[2019-10-03  22:29:23] INFO connection/get_ssl_certificate SSL certificate found at /opt/icecast/ssl/icecast.pem
[2019-10-03  22:29:23] INFO connection/get_ssl_certificate SSL using ciphers ECDHE-RSA-AES128-GCM-SHA256:ECDHE-ECDSA-AES128-GCM-SHA256:ECDHE-RSA-AES
Now the nginx part. Edit /etc/nginx/nginx.conf.
- uncomment the section for “a TLS enabled server”. Remove the # from all the lines below # Settings for a TLS enabled server. Don’t uncomment this line.
- Replace location / {} with this snippet. Not the first occurrence for port 80. This is for port 443.
location /myradio.ogg {
  proxy_set_header Host $host;
  proxy_set_header X-Real-IP $remote_addr;
  proxy_pass http://localhost:8000/myradio.ogg;
}
Copy your private key to /etc/pki/nginx/private/server.key and your public certificate to /etc/pki/nginx/server.crt. If the directories do not exists, create them. (cd /etc/pki && mkdir -p nginx/private). Also, make sure that the certificate (server.crt) is a chain of certificates, not just a simple server certificate. If you do curl -iv https://yoursite.com, the result for the SSL should be clear without any errors or warning. You can reuse the icecast.pem certificate for icecast and copy that file as server.crt under /etc/pki/nginx/. You can even reference the same file in the same directory, but then you have to change the config files and permissions.
Reload nginx (systemctl reload nginx)
Open the firewall
firewall-cmd --add-port=443/tcp --zone=public --permanent
firewall-cmd --reload
Now you can access your server with https. If you want to be even more precise, you can redirect the http to https, so you don’t have to specify the protocol in the browser. Edit nginx.conf and add line 5. Reload nginx after (systemctl reload nginx).
server {
    listen       80 default_server;
    listen       [::]:80 default_server;
    server_name  _;
    return 301 https://$host$request_uri;
    root         /usr/share/nginx/html;
Here is my /etc/nginx/nginx.conf file.
user nginx;
worker_processes auto;
error_log /var/log/nginx/error.log;
pid /run/nginx.pid;

# Load dynamic modules. See /usr/share/nginx/README.dynamic.
include /usr/share/nginx/modules/*.conf;

events {
    worker_connections 1024;
}

http {
    log_format  main  '$remote_addr - $remote_user [$time_local] "$request" '
                      '$status $body_bytes_sent "$http_referer" '
                      '"$http_user_agent" "$http_x_forwarded_for"';

    access_log  /var/log/nginx/access.log  main;

    sendfile            on;
    tcp_nopush          on;
    tcp_nodelay         on;
    keepalive_timeout   65;
    types_hash_max_size 2048;

    include             /etc/nginx/mime.types;
    default_type        application/octet-stream;

    # Load modular configuration files from the /etc/nginx/conf.d directory.
    # See http://nginx.org/en/docs/ngx_core_module.html#include
    # for more information.
    include /etc/nginx/conf.d/*.conf;

    server {
        listen       80 default_server;
        listen       [::]:80 default_server;
        server_name  _;
        return 301 https://$host$request_uri;
        root         /usr/share/nginx/html;

        # Load configuration files for the default server block.
        include /etc/nginx/default.d/*.conf;

        location / {
          proxy_set_header Host $host;
          proxy_set_header X-Real-IP $remote_addr;
          proxy_pass http://localhost:8000/myradio.ogg;
        }

        error_page 404 /404.html;
            location = /40x.html {
        }

        error_page 500 502 503 504 /50x.html;
            location = /50x.html {
        }
    }

# Settings for a TLS enabled server.

    server {
        listen       443 ssl http2 default_server;
        listen       [::]:443 ssl http2 default_server;
        server_name  _;
        root         /usr/share/nginx/html;

        ssl_certificate "/etc/pki/nginx/server.crt";
        ssl_certificate_key "/etc/pki/nginx/private/server.key";
        ssl_session_cache shared:SSL:1m;
        ssl_session_timeout  10m;
        ssl_ciphers HIGH:!aNULL:!MD5;
        ssl_prefer_server_ciphers on;

        # Load configuration files for the default server block.
        include /etc/nginx/default.d/*.conf;

        location /myradio.ogg {
          proxy_set_header Host $host;
          proxy_set_header X-Real-IP $remote_addr;
          proxy_pass http://localhost:8000/myradio.ogg;
        }

        error_page 404 /404.html;
            location = /40x.html {
        }

        error_page 500 502 503 504 /50x.html;
            location = /50x.html {
        }
    }

}
Alexa
Now comes the fun part. It’s much easier than you think thanks to Andy Moore. He has a great step-by-step tutorial for this. I’ll quickly go over what’s needed.
You’ll need your:
- Radio station name
- Name of your website
- URL of your stream (it has to be https)
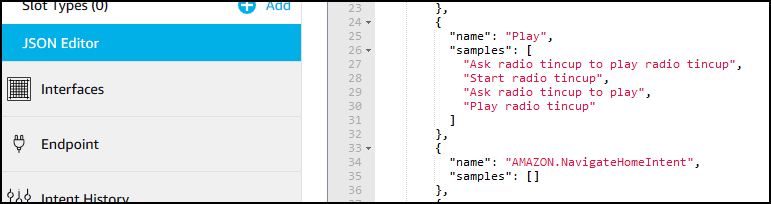
Fun fact. I named my station Radio Andreev and whatever I said, Alexa couldn’t understand. It was looking for Radio Andrea all the time. So, do yourself a favor and name your station something that Alexa can understand. I named my station Radio Tincup, my website is https://radio.iandreev.com and the stream is at https://radio.iandreev.com/myradio.ogg. Generate the JSON from the site above or get this code and change your values. Click the (+) sign to expand.
{
  "interactionModel": {
    "languageModel": {
      "invocationName": "radio tincup",
      "intents": [
        {
          "name": "AMAZON.CancelIntent",
          "samples": [
            "Cancel"
          ]
        },
        {
          "name": "AMAZON.HelpIntent",
          "samples": [
            "Help"
          ]
        },
        {
          "name": "AMAZON.StopIntent",
          "samples": [
            "Stop"
          ]
        },
        {
          "name": "Play",
          "samples": [
            "Ask radio tincup to play radio tincup",
            "Start radio tincup",
            "Ask radio tincup to play",
            "Play radio tincup"
          ]
        },
        {
          "name": "AMAZON.NavigateHomeIntent",
          "samples": []
        },
        {
          "name": "AMAZON.PauseIntent",
          "samples": []
        },
        {
          "name": "AMAZON.ResumeIntent",
          "samples": []
        }
      ],
      "types": []
    }
  }
}
And this is your JavaScript.
const Alexa = require('ask-sdk-core');
var https = require('https');
const PlayHandler = {
canHandle(handlerInput)
{
return (
handlerInput.requestEnvelope.request.type === 'LaunchRequest' ||
(
handlerInput.requestEnvelope.request.type === 'IntentRequest' &&
handlerInput.requestEnvelope.request.intent.name === 'Play'
) ||
(
handlerInput.requestEnvelope.request.type === 'IntentRequest' &&
handlerInput.requestEnvelope.request.intent.name === 'AMAZON.ResumeIntent'
)
);
},
handle(handlerInput)
{
return handlerInput.responseBuilder
.addDirective({
type: 'AudioPlayer.Play',
playBehavior: 'REPLACE_ALL',
audioItem:{
stream:{
token: '0',
url: 'https://radio.iandreev.com/myradio.ogg',
offsetInMilliseconds: 0
}
}
})
.getResponse();
}
};
const PauseStopHandler = {
canHandle(handlerInput)
{
return (
handlerInput.requestEnvelope.request.type === 'IntentRequest' &&
(
handlerInput.requestEnvelope.request.intent.name === 'AMAZON.CancelIntent' ||
handlerInput.requestEnvelope.request.intent.name === 'AMAZON.StopIntent'
)
) ||
(
handlerInput.requestEnvelope.request.type === 'IntentRequest' &&
handlerInput.requestEnvelope.request.intent.name === 'AMAZON.PauseIntent'
);
},
handle(handlerInput)
{
return handlerInput.responseBuilder
.addDirective({
type: 'AudioPlayer.ClearQueue',
clearBehavior: 'CLEAR_ALL'
})
.getResponse();
}
};
const HelpIntentHandler = {
canHandle(handlerInput)
{
return handlerInput.requestEnvelope.request.type === 'IntentRequest' &&
handlerInput.requestEnvelope.request.intent.name === 'AMAZON.HelpIntent';
},
handle(handlerInput)
{
const speechText = 'You can say Play, Stop or Resume. For more information please visit radio dot iandreev dot com';
return handlerInput.responseBuilder
.speak(speechText)
.getResponse();
}
};
const SessionEndedRequestHandler = {
canHandle(handlerInput)
{
return handlerInput.requestEnvelope.request.type === 'SessionEndedRequest';
},
handle(handlerInput)
{
return handlerInput.responseBuilder.getResponse();
}
};
const IntentReflectorHandler = {
canHandle(handlerInput)
{
return handlerInput.requestEnvelope.request.type === 'IntentRequest';
},
handle(handlerInput)
{
const intentName = handlerInput.requestEnvelope.request.intent.name;
const speechText = 'NO INTENT HELP TEXT';
return handlerInput.responseBuilder
.speak(speechText)
.getResponse();
}
};
const ErrorHandler = {
canHandle()
{
return true;
},
handle(handlerInput, error)
{
const speechText = `Sorry, I could not understand what you said. Please try again.`;
return handlerInput.responseBuilder
.speak(speechText)
.reprompt(speechText)
.getResponse();
}
};
exports.handler = Alexa.SkillBuilders.custom()
.addRequestHandlers(
PlayHandler,
PauseStopHandler,
HelpIntentHandler,
SessionEndedRequestHandler,
IntentReflectorHandler)
.addErrorHandlers(
ErrorHandler)
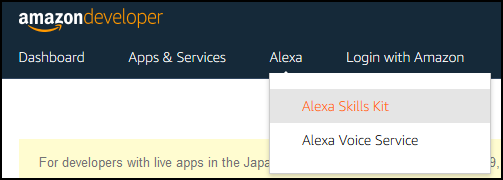
.lambda();Go to https://developer.amazon.com and log in (or register). Make sure you use the same account in the developer console with the same account that you have your Alexa configured. Once logged in, click on Alexa from the menu and then Alexa Skills Kit.
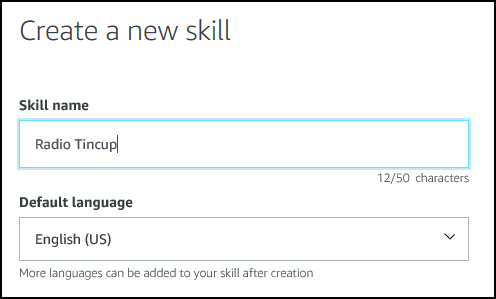
Click Create Skill. Enter the name of your station and the language.
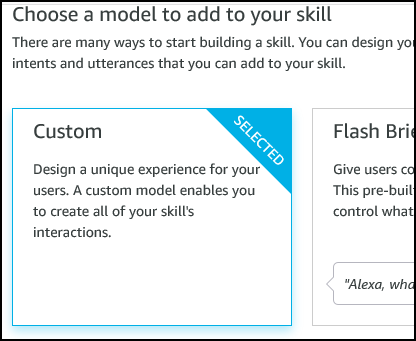
Choose a Custom model.
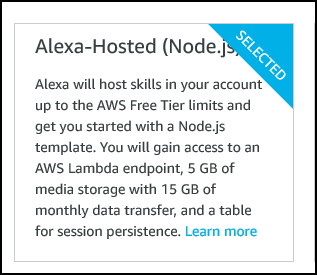
Choose Alexa-Hosted.
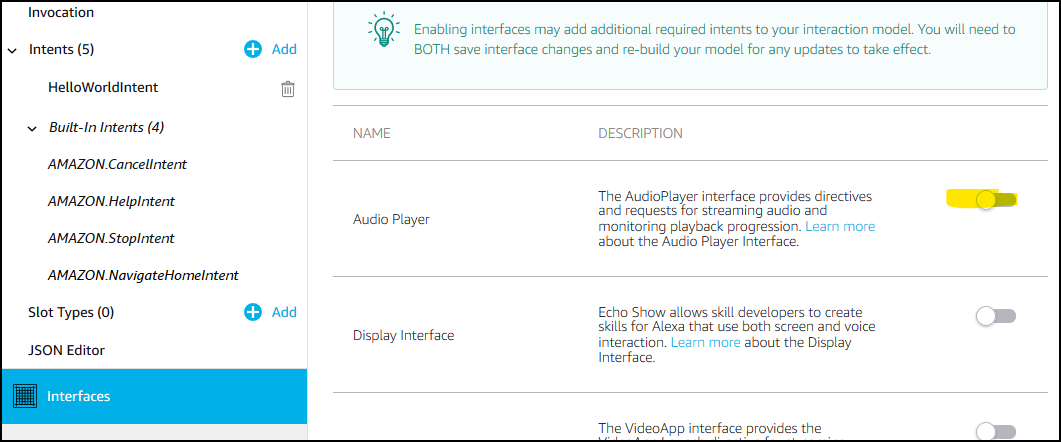
Scroll up and in the top right corner click Create skill. After 30-40 seconds, you’ll be presented with a different screen. On the left side find the Interfaces menu, then click on it. Then enable the Audio Player on the right.
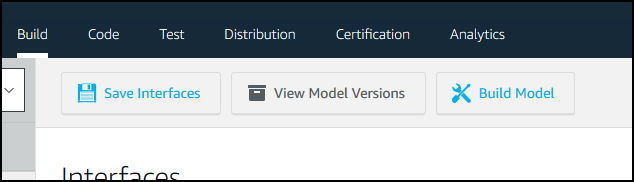
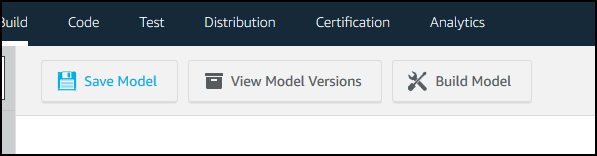
Scroll up and click on Save Interfaces first, then Build Model.
Click on the JSON Editor on the left, right above Interfaces. Once the editor shows up, delete everything there and paste the JSON file.
Click Save Model then Build Model from the top.
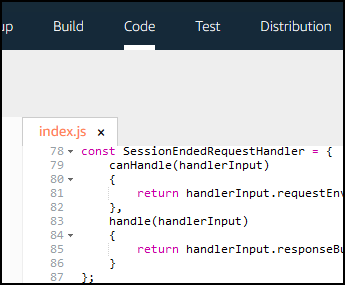
Click on Code from the top and paste the JavaScript in the editor.
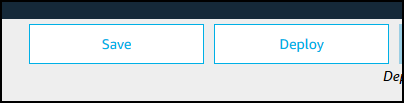
Click Save then Deploy from the upper right.
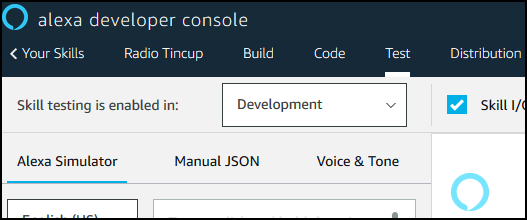
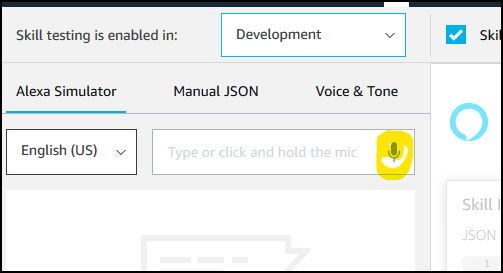
Click on Test, allow access to the microphone and change Skill testing from Off to Development.
Now, with the mouse hit the microphone icon, hold it there, say Alexa Play Radio Tincup and release the button.
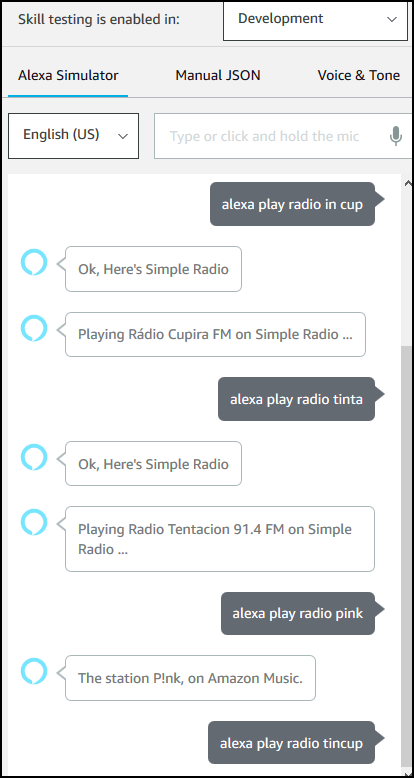
Here is what I was talking to. Alexa can’t understand me…or maybe my mic is bad. If Alexa doesn’t understand, just type “Alexa play Radio Tincup” in the text field.
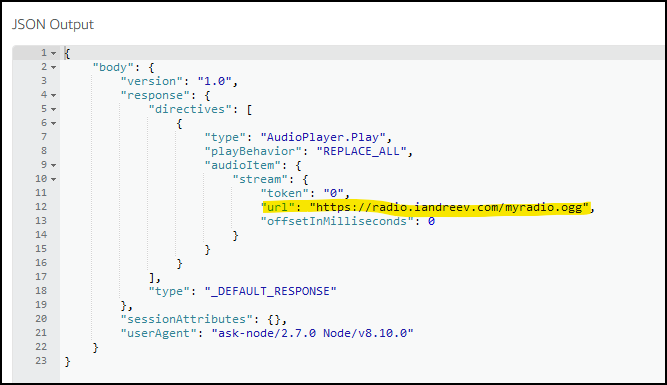
You won’t hear Alexa playing and you won’t hear any music from the computer, but you’ll see a JSON response with the valid URL of your OGG stream.
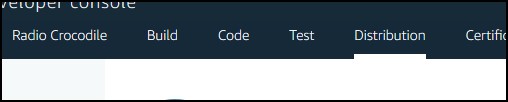
At this point you are all set. You can play your music using Alexa. For most people this would be the end. But if you really like to publish your station to be public, then proceed. In the console, click on Distribution.
You’ll see a bunch of questions regarding the nature of your station, are you collecting customer information, are you advertising and so on. Just follow the process and hopefully, you’ll get your station published.
Cleanup
You might want to delete the tarballs for the icecast, ices and sox that you’ve downloaded.
rm -rf /tmp/ice*
rm -rf /tmp/sox*
You’ll also want to make sure that the firewall allows only port 80 and 443. Ports 8000 and 8443 can be, but they don’t have to be exposed to the Internet.
firewall-cmd --remove-port=8000/tcp --zone=public --permanent
firewall-cmd --remove-port=8443/tcp --zone=public --permanent
firewall-cmd --reload
original credit: https://blog.andreev.it/?p=5735